1. check "keep disk", delete vm quote-xx-ftp
2. vm, debian-attach-bitanmi, edit, attach existing disk quote-xx-ftp, start/resume debian-attach-bitanmi
3. debian-attach-bitanmi, web ssh login, ftp upload .ssh/authorized_keys (maybe use it later)
4. lsblk - get attach disk info, mount /dev/sdb1 /mnt
5. allow ssh password login
more /etc/ssh/sshd_config |grep PasswordAuthentication
PasswordAuthentication yes
6. bitanmi, web root, /mnt/opt/bitnami/apps/joomla/htdocs, folder, le_connector
chown -R rsa-key-20160310:daemon le_connector/
chown -R 777 le_connector
cd /mnt/opt/bitnami/apps/joomla/htdocs/tmp
mv /mnt/root/le_connector.zip .
chmod 777 le_connector.zip

sudo chroot /mnt passwd
Segmentation fault

**** change wu keys
/mnt/home/wu/.ssh

***
umount /mnt

7. vm (running), debian-attach-bitnami, edit, remove disk quote-xx-ftp, save

8. storage -> disks -> quote-xx-ftp, create a new instance
9. check web ssh (not work)
10. test serial console, with command to change root password (later)fix a copy of your disk
This is the most complete and powerful repair method, but also the hardest:
1. Snapshot the disk of your instance, creating "orig-snapshot"
2. Create a new disk called "fix-disk" from "orig-snapshot".
3. Create a new instance called "fix-instance" using the debian or redhat images.
4. Attach "fix-disk" to "fix-instance" as a secondary disk
5. SSH to "fix-instance".
6. Inside "fix-instance", mount "fix-disk" on /mnt.
7. You can then access your data on /mnt. If you just want access to your data, this should be sufficient. If you want to fix the disk, continue...
8. If you know the file you edit that broke the instance, edit it on /mnt and fix it.
9. If you want to set a password for the serial console in the future, run sudo chroot /mnt passwd. This will then allow you to set a password.
10. unmount "fix-disk". At this point you can delete "fix-instance", but make sure you don't delete "fix-disk".
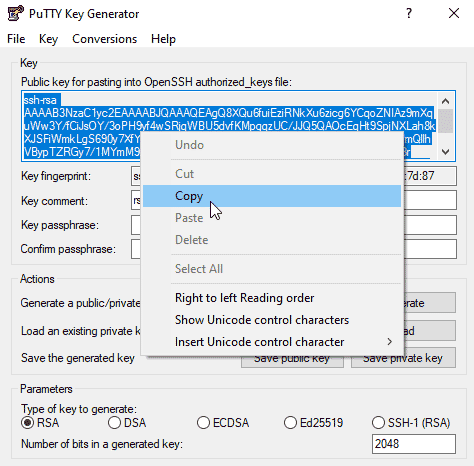
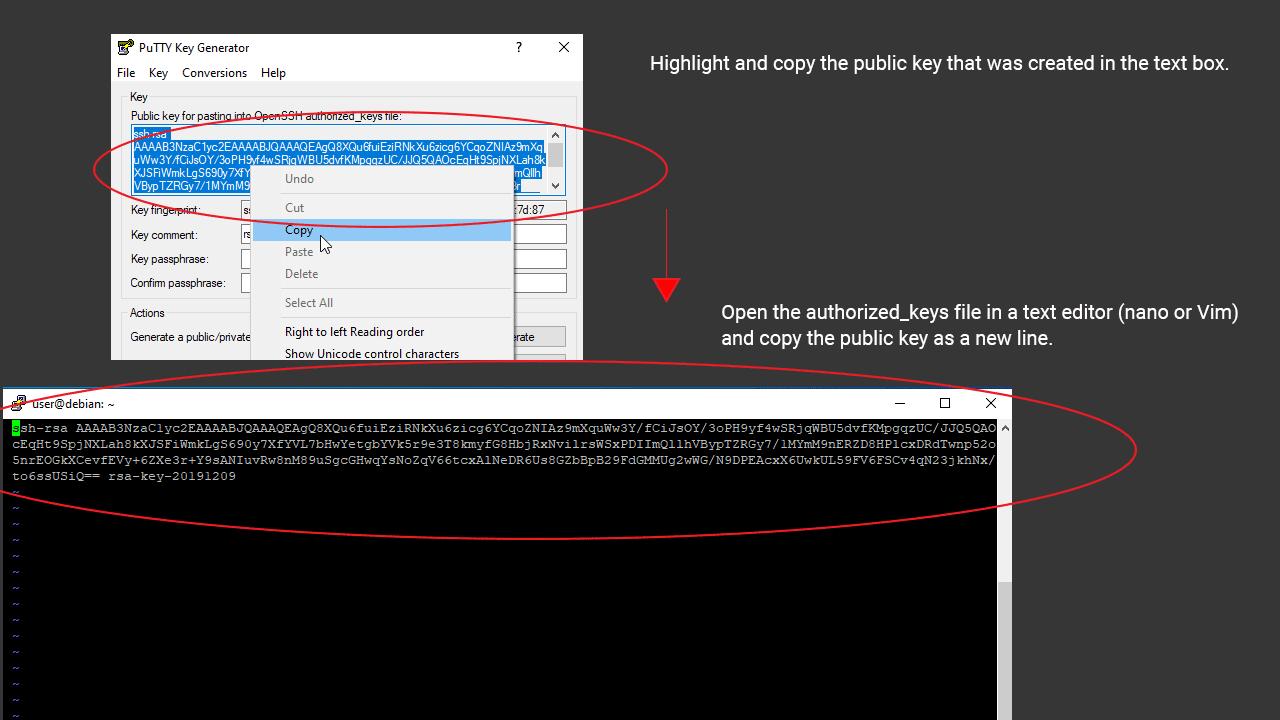
11. Create a new instance using "fix-disk" as it's boot disk. This new instance will be a replacement for your original instance, but with the fixes you made in (8) and (9). If you need to keep the same IP address, you will have to move it from your old instance.the public key from your Windows 10 PC to the user’s authorized_keys file.
Note that each user has their own authorized_keys file in the home directory. For example, If you log in as user root, you need to place the public key to the “/root/.ssh/authorized_keys”.
To solve the “server refused our key” error, you can do the following steps:
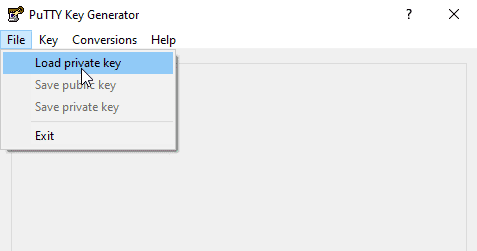
Open PuTTYgen, Go to File > Load Private key and open your Private Key File.
Next, Log in to the Linux server and change to the home directory with the cd command:
cd ~/Then, create the .ssh folder and the .ssh/authorized_keys file (if it doesn’t already exist):
mkdir ~/.ssh
touch ~/.ssh/authorized_keys
Open the authorized_keys file and paste the public key.
When you are finished, save the file exit the session.
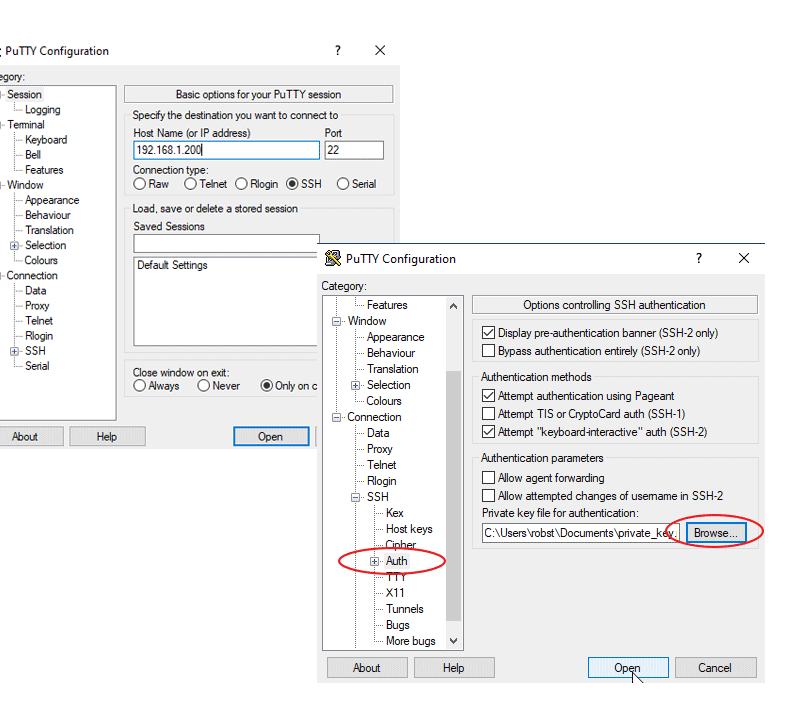
To connect to the remote server. Open the PuTTY terminal and provide the IP address of the remote server. Then, Go to Connection > SSH > Auth and Load the private key after clicking on the Browse button.
 Posted inUncategorized